 Save
Save My cousin brought these to a Super Bowl party three years ago, and I watched a tray of twelve disappear in under ten minutes. Everyone kept asking what was in them, and she just smiled and said it was her secret weapon. The next week, I called her for the recipe, and now I make them for every gathering where I want to guarantee empty plates. Theyre messy, theyre indulgent, and theyre impossible to eat just one.
I made these for my daughters birthday sleepover last spring, and even the pickiest eaters went back for seconds. One of her friends said she didnt like spicy food, so I set aside a few sliders with less Buffalo sauce, and she ended up trying the regular ones anyway. By the end of the night, the girls were dipping leftover celery sticks into the cheesy drips at the bottom of the pan. It became the recipe her friends still ask about when they come over.
Ingredients
- Cooked chicken breast, shredded: Rotisserie chicken works beautifully here and saves time, just make sure its shredded into small, bite-sized pieces so every slider gets an even amount.
- Buffalo wing sauce: This is what gives the dip its signature tangy heat, and you can control the spice level by choosing mild, medium, or hot varieties.
- Cream cheese, softened: Let it sit at room temperature for about 30 minutes before mixing so it blends smoothly without lumps.
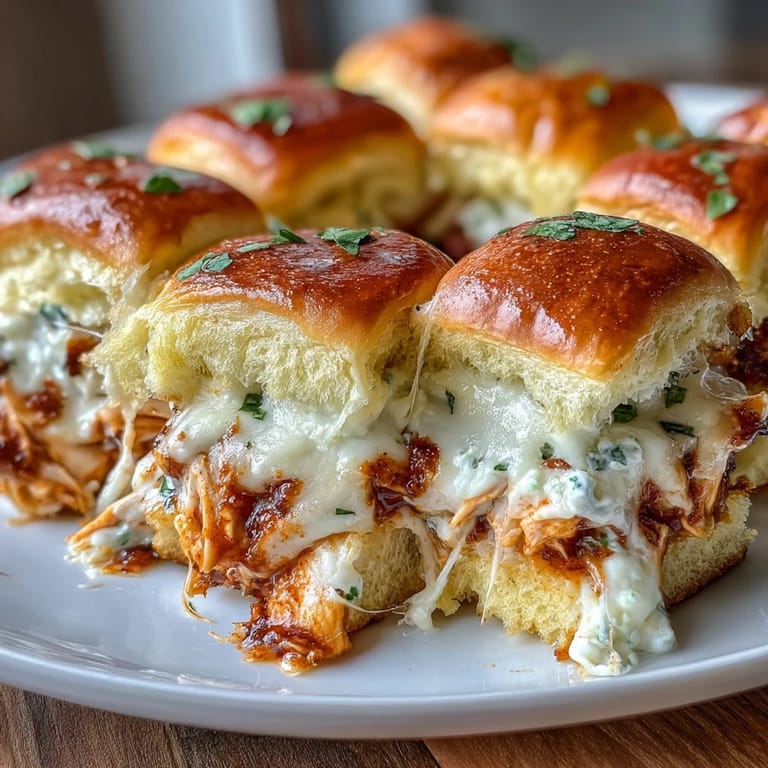
- Ranch dressing: Adds a cool, herby balance to the heat, and you can swap in blue cheese dressing if you want a sharper flavor.
- Sour cream: This makes the filling extra creamy and helps mellow out the spice just enough.
- Shredded mozzarella cheese: Melts beautifully and gives you those satisfying cheese pulls when you bite into a slider.
- Shredded cheddar cheese: Adds a sharper, richer flavor that complements the mozzarella perfectly.
- Slider buns: Hawaiian rolls are my go-to because theyre soft, slightly sweet, and hold up well to the creamy filling without getting soggy.
- Unsalted butter, melted: Brushed on top with garlic powder, this creates a golden, flavorful crust that makes the sliders irresistible.
- Garlic powder: Just a small amount transforms the butter into something that smells amazing as it bakes.
- Chopped fresh parsley: Optional, but it adds a pop of color and a fresh note that brightens up the richness.
Tired of Takeout? 🥡
Get 10 meals you can make faster than delivery arrives. Seriously.
One email. No spam. Unsubscribe anytime.
Instructions
- Preheat and Prep:
- Set your oven to 350°F and lightly grease a 9x13-inch baking dish so the buns dont stick. This is the time to make sure everything is ready before you start layering.
- Mix the Filling:
- In a large bowl, combine the shredded chicken, Buffalo sauce, softened cream cheese, ranch dressing, and sour cream, stirring until everything is smooth and well blended. The cream cheese should be fully incorporated without any white streaks left behind.
- Add Half the Cheese:
- Fold in half of the mozzarella and half of the cheddar, leaving the rest for topping. This ensures theres cheese throughout the dip and a gooey layer on top.
- Slice and Layer the Buns:
- Cut the slider buns in half horizontally, keeping them connected if you can, and place the bottom halves in the baking dish. This makes assembly easier and keeps everything neat.
- Spread the Dip:
- Spoon the Buffalo chicken mixture evenly over the bottom buns, spreading it to the edges. You want every bite to have that creamy, tangy filling.
- Top with Cheese:
- Sprinkle the remaining mozzarella and cheddar over the chicken layer. Dont be shy, this is what creates that bubbly, golden top.
- Add the Top Buns:
- Place the top halves of the buns over the cheese, pressing down gently. They should sit snugly over the filling.
- Brush with Garlic Butter:
- Mix the melted butter with garlic powder and brush it generously over the tops of the buns. This step is key for that golden, flavorful crust.
- Bake Covered:
- Cover the dish with foil and bake for 15 minutes, which steams the buns and melts the cheese without over-browning the tops. The foil traps the heat and keeps everything moist.
- Finish Uncovered:
- Remove the foil and bake for another 8 to 10 minutes until the cheese is bubbly and the tops are golden brown. Watch closely during the last few minutes so they dont burn.
- Garnish and Serve:
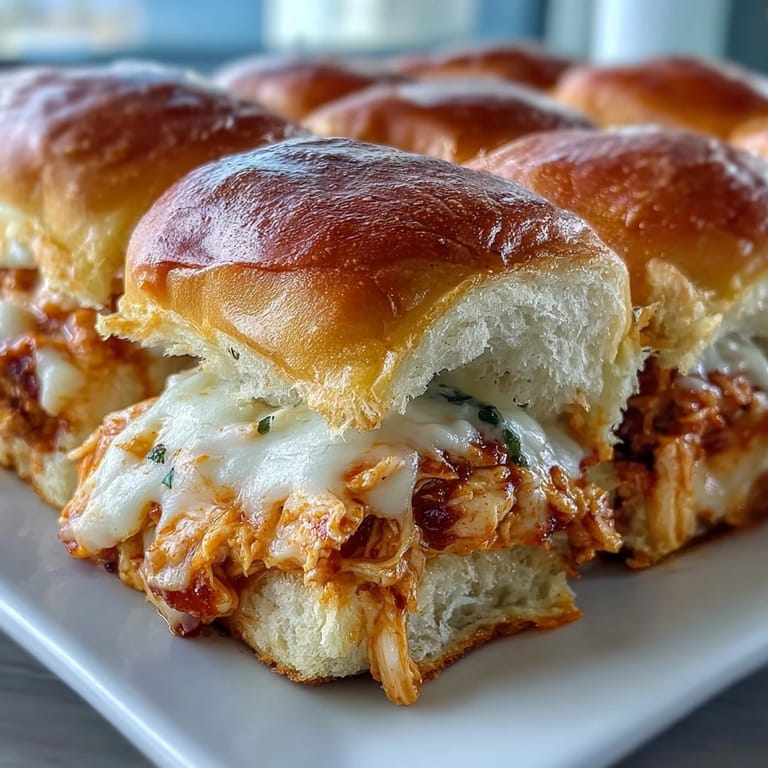
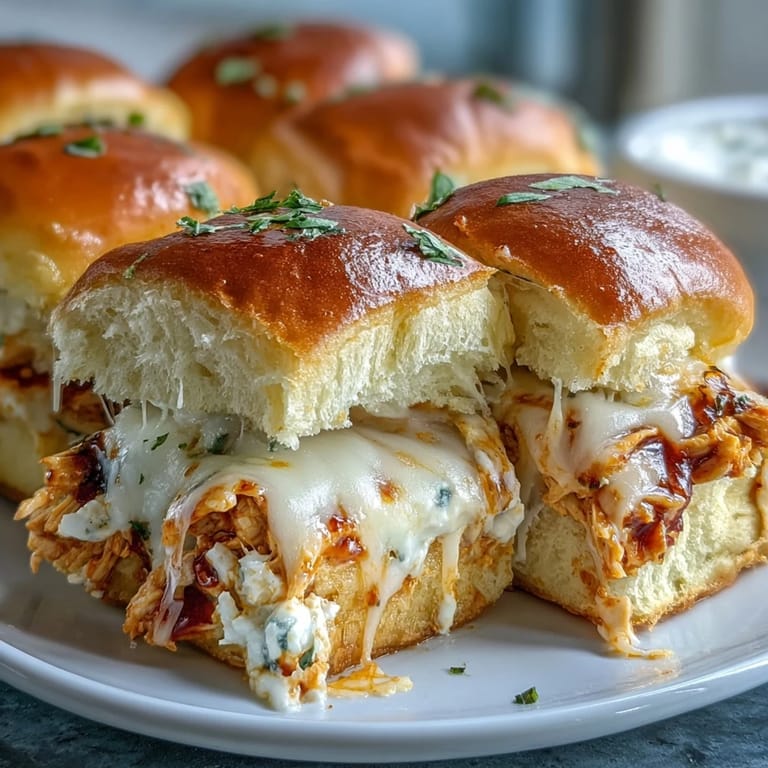
- Sprinkle with chopped parsley if you like, then slice between the buns and serve warm. They taste best right out of the oven when the cheese is still gooey.
 Save
Save  Save
Save The first time I brought these to a potluck, someone asked if I could make them for her book club the following week. I ended up making two trays because she said her friends would riot if there werent enough. When she texted me a photo of the empty pans later, she said they barely made it through the first chapter before everyone was too distracted by the sliders.
Making Them Ahead
You can assemble these sliders completely, cover them tightly with foil, and refrigerate them for up to 24 hours before baking. Just add an extra 5 minutes to the covered baking time since theyll be cold from the fridge. I do this all the time when Im hosting, and it takes so much stress out of party prep. You can also freeze them unbaked for up to a month, then thaw in the fridge overnight before baking.
Adjusting the Heat
If youre feeding a crowd with mixed spice tolerance, use a mild Buffalo sauce and set out extra hot sauce on the side so people can customize. I learned this after my neighbor politely ate one slider and then chugged a glass of water because I used my favorite extra-hot brand. You can also add a little more ranch or sour cream to the dip to cool it down without losing flavor.
Serving Suggestions
These sliders are perfect on their own, but I love serving them with celery and carrot sticks on the side for crunch. A small bowl of extra Buffalo sauce or ranch for dipping makes people happy, and it adds to that classic wing experience. If youre serving them for a meal instead of an appetizer, a simple side salad or coleslaw balances out the richness.
- Set out napkins, because these get deliciously messy and people will need them.
- If you have leftovers, reheat them in the oven at 300°F for about 10 minutes so the buns stay soft.
- Try adding crumbled cooked bacon or sliced green onions to the filling for an extra layer of flavor.
 Save
Save  Save
Save These sliders have become my go-to whenever I need to feed a crowd or bring something to share. Theyre easy, theyre crowd-pleasers, and they always disappear fast, which is exactly what you want from a great appetizer.
Recipe FAQs
- → Can I make these sliders ahead of time?
Yes, you can assemble the sliders up to 24 hours in advance. Cover tightly with foil and refrigerate. When ready to serve, bring to room temperature for 15 minutes, then bake as directed, adding a few extra minutes if needed.
- → What type of chicken works best for this dish?
Rotisserie chicken is ideal for convenience and flavor. You can also use leftover grilled chicken, poached chicken breast, or even canned chicken in a pinch. Just ensure it's shredded into bite-sized pieces.
- → Can I substitute the Buffalo sauce with something milder?
Absolutely. For a milder version, use a combination of hot sauce and melted butter, or try a honey Buffalo sauce. You can also reduce the amount of Buffalo sauce and increase the ranch dressing for a creamier, less spicy filling.
- → How do I prevent the buns from getting soggy?
Make sure the cream cheese mixture is well-combined and not too runny. Baking with foil first allows the filling to set, and removing the foil at the end crisps up the tops. Serving immediately after baking also helps maintain texture.
- → What sides pair well with these sliders?
Classic pairings include celery and carrot sticks with ranch or blue cheese dressing, tortilla chips with salsa, coleslaw, or a simple green salad. These sides complement the rich, spicy flavors of the sliders perfectly.
- → Can I freeze these sliders?
Yes, you can freeze assembled, unbaked sliders. Wrap tightly in plastic wrap and foil, then freeze for up to 2 months. Thaw overnight in the refrigerator before baking as directed.