 Save
Save My nephew's Little League coach asked me to bring something special for the championship party, and I found myself staring at a blank kitchen counter on a Friday afternoon wondering what would actually impress a bunch of nine-year-olds. Then it clicked—why not make something that looked like the game itself? These brownie bites came together almost by accident, really, born from the idea that food could be both delicious and playful. The moment I piped those white icing laces onto the dark chocolate domes, I knew I'd cracked something good. They disappeared faster than any home run that season.
I brought three dozen to that party, and they were gone in twenty minutes flat—including the ones I was pretty sure I'd hidden in the back corner. What stuck with me wasn't just that they disappeared, but watching a kid carefully examine one before eating it, actually admiring the laces before devouring it. That's when I realized these weren't just brownies; they were tiny edible souvenirs of a moment worth celebrating.
Ingredients
- Unsalted butter (115 g): It keeps the brownie flavor pure without competing saltiness, and melting it with chocolate creates that silky, fudgy texture everyone expects.
- Semisweet chocolate chips (170 g): They're the backbone here—good quality chips melt smoother and taste less waxy than the bargain bags, though honestly either works fine.
- Granulated sugar (150 g): Don't skip this or reduce it; brownies need sweetness to balance the dark chocolate and create that chewy center you're after.
- Large eggs (2): They bind everything and add moisture, so room temperature eggs mix in more smoothly than cold ones straight from the fridge.
- Vanilla extract (1 tsp): A small splash that rounds out the chocolate flavor and adds a subtle warmth you can't quite identify but definitely notice when it's missing.
- All-purpose flour (65 g): The minimal amount keeps these fudgy rather than cakey, so measure carefully and don't pack it down in the measuring cup.
- Salt (1/4 tsp): Just a pinch that makes the chocolate taste more like itself, deepening the whole experience.
- Powdered sugar (60 g): For the icing, it dissolves instantly with milk to create a smooth, pipeable paste that sets just right.
- Milk (1-2 tsp): Start with one teaspoon and add more a tiny bit at a time until your icing reaches the perfect consistency—too thick and you'll struggle to pipe, too thin and it'll slide right off.
Tired of Takeout? 🥡
Get 10 meals you can make faster than delivery arrives. Seriously.
One email. No spam. Unsubscribe anytime.
Instructions
- Set your stage:
- Preheat that oven to 175°C and get your mini muffin tin ready with either paper liners or a light greasing. It only takes a minute, but doing this first means you're never scrambling when the batter's ready.
- Melt chocolate and butter together:
- Microwave them in 30-second bursts, stirring between each one, until everything's smooth and glossy. This gentle approach beats blasting them all at once, which can make the chocolate grainy.
- Build the batter:
- Whisk in sugar first, then add eggs one at a time, making sure each one is fully incorporated before the next. The mixture should look creamy and light, which means air's getting worked in properly.
- Add vanilla and fold in flour:
- Stir vanilla into the chocolate mixture, then add flour and salt all at once, folding gently with a spatula until you can't see streaks anymore. This is where restraint matters—overmixing develops gluten and creates tough, cakey brownies instead of the fudgy ones you want.
- Fill and bake:
- Divide batter among cups until each is about three-quarters full, then slide the tin into the oven for 16 to 18 minutes. The brownies are done when a toothpick comes out with moist crumbs still clinging to it—that's the secret to fudginess.
- Cool with patience:
- Let them sit in the tin for 5 minutes so they set slightly, then transfer to a wire rack to cool all the way. Trying to decorate warm brownies is a recipe for smudged icing and a small kitchen disaster.
- Make your icing:
- Whisk powdered sugar with a teaspoon of milk and optional vanilla, then add milk one tiny splash at a time until it's thick but flows smoothly through a piping bag. The consistency matters here—too thick won't pipe, too thin won't stay in place.
- Pipe the laces:
- Fill a piping bag or small zip-top bag (snip the tiniest corner if using the bag trick), then pipe two curved lines across each brownie bite, followed by small perpendicular lines to create that baseball stitch look. It sounds fussy but feels intuitive once you start.
- Set and serve:
- Give the icing a few minutes to firm up before moving them around or eating, and they're ready to impress.
 Save
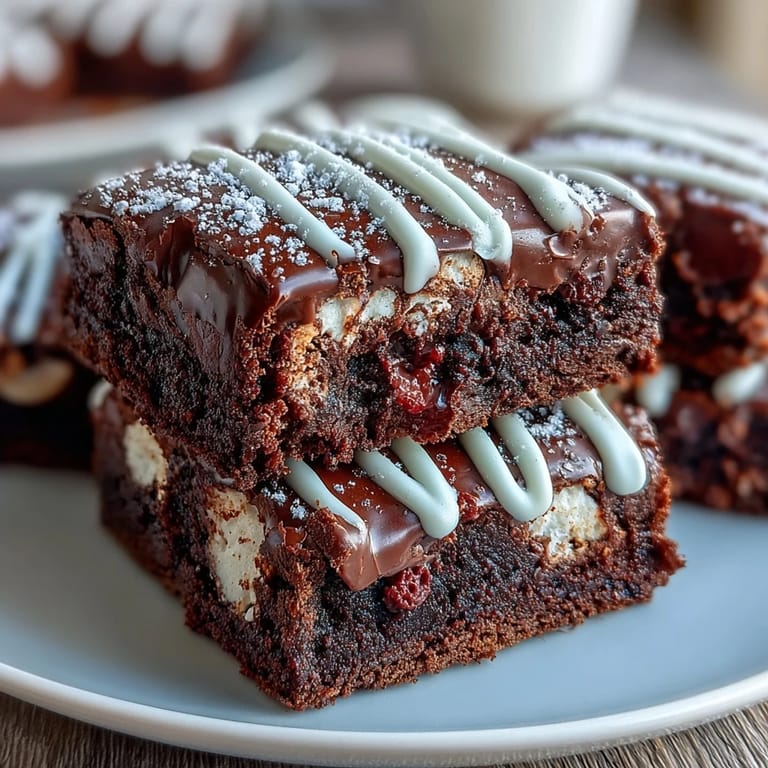
Save The magic moment in making these comes when you pipe those laces and suddenly a bunch of dark chocolate domes turn into something that looks like it escaped from a souvenir stand. They stop being just brownies and become little celebrations in your hands.
The Fudgy Factor
Fudgy brownies live in that sweet spot between fully baked and underbaked, and it's harder than it sounds to nail the timing. The oven temperature matters more than you'd think—too hot and they'll set too fast on the outside while staying raw inside, too cool and you'll wait forever. I learned this the hard way one Tuesday morning when I had to remake an entire batch because I'd cranked the oven up thinking it would speed things along. Now I trust the lower temperature and the clock, and they come out perfect every time. The key is checking at 16 minutes and only baking longer if truly needed—those last two minutes can mean the difference between fudgy and cakey.
Decorating Like You Mean It
The icing is honestly the fun part, the moment where these stop feeling like you're following directions and start feeling like you're creating something. You don't need professional piping bags or fancy tips—a basic round tip or even a small zip-top bag with a corner snipped off works beautifully. The stitching pattern doesn't have to be perfect either; real baseballs aren't uniform, so yours don't need to be either. I've found that piping a curved line down the center first, then adding perpendicular lines, creates the most recognizable look without overthinking it. If red food coloring is available, a drop or two in the icing gives them that authentic baseball vibe that really sells the theme.
Storage and Keeping Them Fresh
These brownies hang around beautifully for three days in an airtight container at room temperature, which means you can make them a day or two ahead for a party and actually enjoy the party instead of baking in a panic. I usually layer them between parchment paper in a container so the icing doesn't smudge everywhere. They don't need the fridge unless your kitchen is unusually warm, and cold brownies are actually less fudgy anyway—they taste best when they've been sitting out for an hour or so after coming out of the cold. If you find yourself with leftovers (rare, I know), they're excellent crumbled over ice cream or even eaten straight from the fridge on a lazy afternoon when you need a little chocolate pick-me-up.
- Line your container with parchment between layers to protect those beautiful icing laces from smudging.
- Let them come to room temperature before eating if you've stored them in the cold—about an hour does the trick.
- These freeze beautifully too, either decorated or plain, for up to a month if you want to get ahead on game day prep.
 Save
Save These little brownie baseballs have become my go-to for anything sports-related, birthday parties, or just because I want to remind someone that food doesn't have to be serious to be delicious. Make them once and you'll understand why.
Recipe FAQs
- → What type of chocolate is used for the brownie bites?
Semisweet chocolate chips are melted with butter to create a rich and fudgy base.
- → How is the white icing prepared for the laces?
Powdered sugar is mixed with milk and optional vanilla extract to reach a thick, pipeable consistency for decorating.
- → Can these brownie bites be stored for later?
Yes, store them in an airtight container at room temperature for up to three days to maintain freshness.
- → What baking equipment is needed for these bites?
A mini muffin tin is essential to create uniform bite-sized portions, along with tools for melting and mixing.
- → Are these brownie bites suitable for vegetarians?
Yes, they contain no meat or animal-derived gelatin, fitting well within a vegetarian diet.