 Save
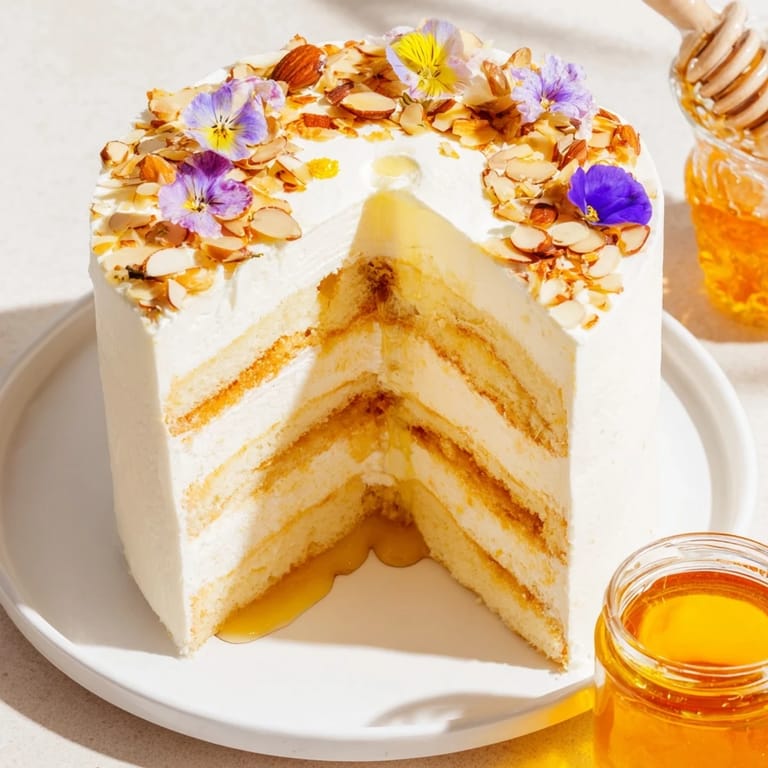
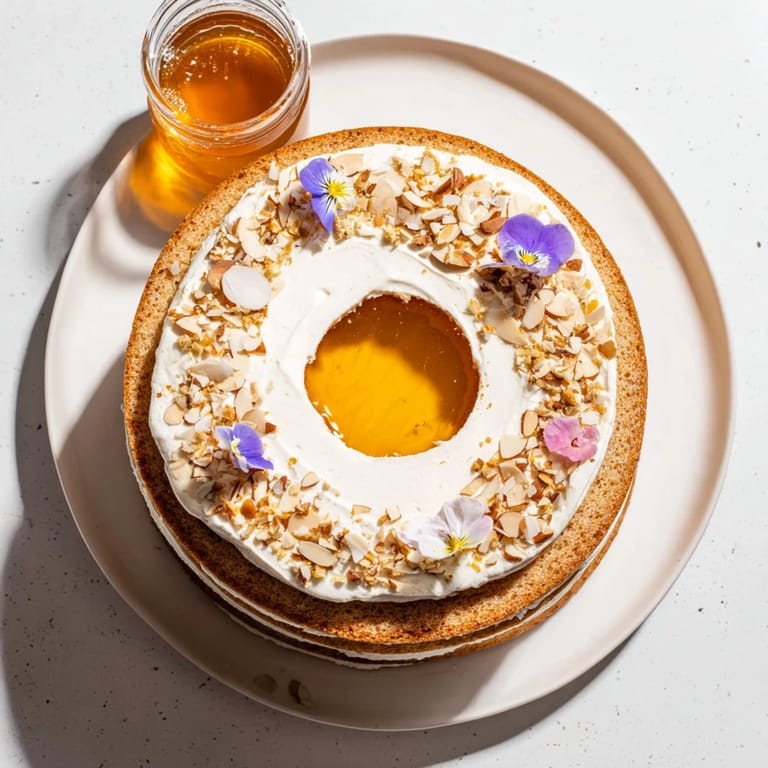
Save There's something about honey that makes you pause in the kitchen. I stumbled onto this dessert by accident, actually—I'd overheard someone at a farmers market raving about a honey-forward cake, and their description stuck with me so vividly that I spent the next week obsessed with the idea of building an entire experience around it. The moment I realized I could carve out a center and fill it with warm, flowing honey, turning the whole thing into an interactive moment at the table, everything clicked into place. Guests can't help but smile when they see it, that golden pool waiting right there in the middle of the cake. It's the kind of dessert that doesn't just taste special—it feels like an occasion.
I made this for a small dinner party on a late summer evening, and I'll never forget how quiet the table went when I set it down. Someone actually gasped—which sounds dramatic, but there it was. The cake itself is tender and subtly honeyed, but it's that interactive element that transforms it from dessert into theater. Watching my friends carefully dip each forkful, tasting the way the warm honey played against the cool honey cream filling, I realized this was exactly the kind of dish that sticks with people.
Ingredients
- All-purpose flour: Two cups forms the foundation of a tender crumb that won't overpower the honey's delicate flavor.
- Baking powder and baking soda: The combination of both lifts the cake without making it too airy or dense; don't skip either one.
- Unsalted butter: Half a cup, softened, creams best when it's genuinely soft—almost paste-like—before you add sugar.
- Honey: The half cup mixed into the batter should be mild and clear; bold, dark honeys can overwhelm the delicate crumb.
- Eggs: Three large eggs bind everything together and add richness; bring them to room temperature for better emulsification.
- Heavy cream: A full cup whips into the honey cream filling and gives you that cloud-like texture that contrasts beautifully with the cake's softness.
- Mascarpone cheese: Quarter cup stabilizes the whipped cream so it doesn't weep; it also adds a subtle tang that balances the sweetness.
- High-quality liquid honey for serving: This is your star—wildflower or acacia honey brings floral notes and a silky texture; use something you'd actually enjoy eating straight from a spoon.
- Toasted almonds: A quarter cup chopped adds texture and a gentle nuttiness that doesn't compete with the honey; toasting them yourself makes a real difference in flavor.
Tired of Takeout? 🥡
Get 10 meals you can make faster than delivery arrives. Seriously.
One email. No spam. Unsubscribe anytime.
Instructions
- Set your stage:
- Preheat the oven to 350°F and grease two 8-inch round cake pans thoroughly, then line the bottoms with parchment paper—this prevents any sticking on what's going to be a show-stopping dessert. Have all your ingredients measured and ready before you start mixing; honey-infused batters don't like to sit around waiting.
- Build the dry base:
- Whisk together your flour, baking powder, baking soda, and salt in one bowl until everything is evenly distributed. This aerates the flour slightly and ensures your leavening agents are spread throughout, preventing any pockets of raw batter.
- Cream butter and sugar:
- Beat your softened butter with granulated sugar until the mixture looks pale and fluffy—this usually takes 3-4 minutes with an electric mixer. This step incorporates air, which helps the cake rise and creates a tender crumb.
- Marry wet and sweet:
- Add your honey, eggs one at a time (beating after each addition), and vanilla extract to the butter mixture, beating well until it's thoroughly combined. The honey integrates best when you're patient here; rushing creates a grainy texture.
- The gentle fold:
- Alternate adding the dry ingredients and milk to the wet mixture, starting and ending with dry, mixing just until you see no white streaks of flour. Overmixing develops gluten, which makes the cake tough instead of tender.
- Into the oven:
- Divide the batter evenly between your prepared pans and bake for 22-25 minutes, until a toothpick inserted in the center comes out clean or with just a few moist crumbs. The cakes will smell like a honey-sweetened dream.
- Cool with patience:
- Let the cakes cool completely in their pans, then turn them out onto wire racks. This prevents them from crumbling when you slice them later.
- Make the honey cream:
- Whip your heavy cream to soft peaks, then gently fold in the honey and mascarpone cheese, whipping again until stiff peaks form. Chill this until you're ready to assemble; cold filling is easier to work with.
- Slice into layers:
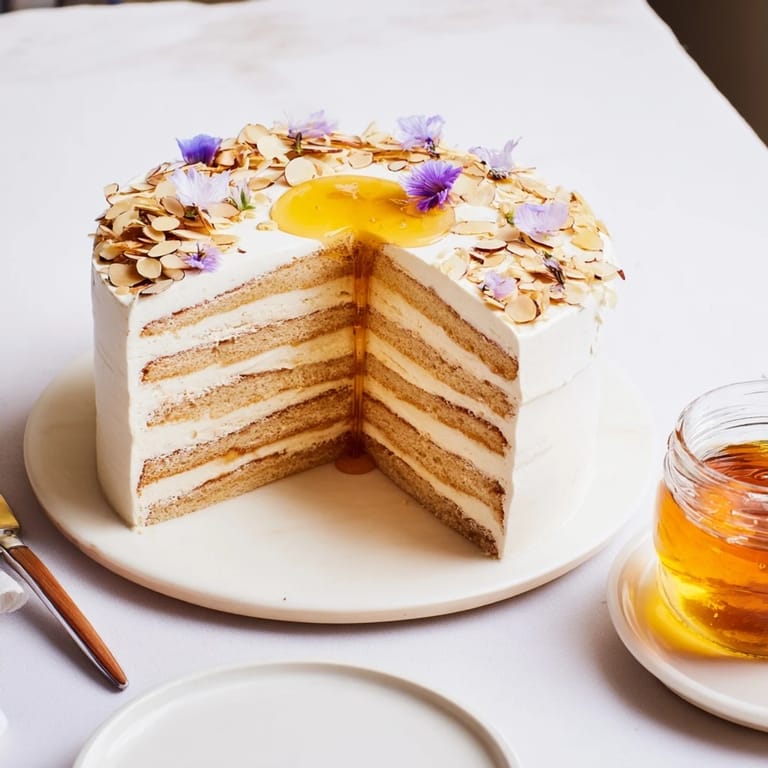
- Carefully slice each cooled cake horizontally to create four thin layers total—use a serrated bread knife and a gentle sawing motion. These thin layers are what make the whole thing feel elegant and sophisticated.
- Stack with care:
- Place the first layer on your serving platter, spread generously with honey cream, and repeat with the remaining layers and filling, ending with a layer on top. This is meditative work; take your time.
- Carve the center:
- Using a 3-inch round cutter, carefully cut a hole from the very center of the stacked cake—this is where your honey pot will sit. A steady hand and a sharp cutter make this easier; wiggle gently rather than push hard.
- Crown it:
- Place a small glass or ceramic honey pot in the center hole and fill it with your best liquid honey. Garnish the top with toasted almonds, edible flowers if you'd like, and a final drizzle of honey around the edges.
 Save
Save What made this dessert truly special wasn't just the taste—it was the moment of connection at the table. Someone reached for their honey-dipped bite, tasted that contrast of soft cake, cool cream, and warm honey all at once, and their face just lit up with genuine delight. That's when I understood why this recipe matters so much to me.
On Honey Selection
I learned quickly that not all honeys are created equal when it comes to this dessert. The honey in the cake needs to be mild enough to let the vanilla and butter shine through, while the honey in the center pot should be something you're proud to serve—something with character. I've played around with everything from orange blossom to lavender varieties, and each one shifts the entire experience in subtle ways. A single-origin honey can make the difference between a nice dessert and one that people ask you about for months afterward.
The Art of the Honey Pot
Finding the right vessel for your central honey pool matters more than you'd think. I started with a regular small bowl, but it felt clunky and practical rather than intentional. A small glass pot, something with delicate walls that lets you see the honey's color and clarity, elevates the whole thing. Ceramic works beautifully too, especially if it has a gentle honey or gold tone that echoes the honey itself. It's one small detail that separates a good idea from something that feels genuinely precious.
Flavor Variations and Serving Suggestions
Once you master the base recipe, the variations open up in interesting ways. I've made versions with different honey varieties, added a touch of cardamom to the cake batter, and even experimented with infusing the honey cream with a whisper of lavender. The structure is forgiving enough that you can play. As for serving, I always recommend pairing this with something bright—a Moscato or late-harvest Riesling brings out the honey's sweetness while a chilled prosecco cuts through it. Some nights I skip wine entirely and serve it with strong black coffee, letting the bitter-sweet combination do the talking.
- For a nut-free version, simply omit the toasted almonds and add an extra garnish of fresh edible flowers instead.
- If you're making this ahead, assemble everything except the final honey pour up to 4 hours in advance; add the warm honey just before guests arrive.
- The unfilled cake layers keep, wrapped tightly, for up to two days—perfect for when you want to assemble closer to serving time.
 Save
Save There's something quietly magical about a dessert that asks people to participate, to slow down and taste deliberately. Every time I make this, I'm reminded that the best recipes aren't just about following steps—they're about creating moments.
Recipe FAQs
- → How is the honey flavor incorporated into the cake?
Honey is added directly into the batter, creating moist cake layers with a natural sweetness and floral aroma.
- → What is the purpose of the central honey pot?
The central pot holds warm liquid honey, allowing guests to dip each bite for an interactive, rich honey experience.
- → Can I substitute the type of honey used?
Yes, experimenting with varieties like orange blossom or lavender honey can add unique floral notes to the cake.
- → How are the cake layers prepared for assembly?
After baking, each cake is sliced horizontally into thin layers to be alternated with honey cream filling.
- → What garnish complements the cake’s flavor and presentation?
Chopped toasted almonds and edible flowers provide texture and a visually appealing finish, enhancing natural honey undertones.
- → Is there a nut-free option for this dish?
Yes, simply omit the toasted almonds to accommodate nut allergies without affecting the core flavors.