 Save
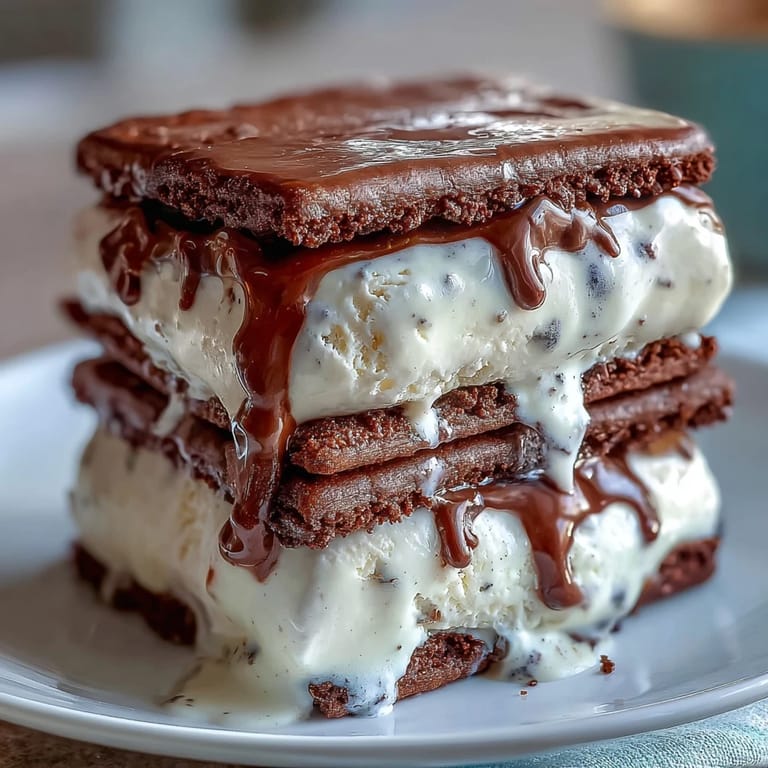
Save Summer afternoons at my favorite coffee shop inspired these ice cream sandwiches—that moment when someone orders a vanilla frappuccino and you think, what if this was frozen solid between two rich cookies? It took a few experiments in my kitchen, some burnt batches, and a happy accident with leftover espresso powder before I landed on this version. Now they're my go-to when friends drop by unexpectedly, and somehow they always disappear faster than I can plate them.
I'll never forget the look on my sister's face when she bit into one of these for the first time—her eyes went wide and she immediately reached for another without saying a word. That silent approval meant more to me than any compliment, and it's been her request every time she visits since.
Ingredients
- Unsalted butter (1 cup, softened): Softness matters here—it creams better and distributes the espresso flavor evenly throughout your dough.
- Packed brown sugar (1 cup): This adds moisture and depth that plain white sugar can't deliver on its own.
- Granulated sugar (1/2 cup, for cookies): The combination of both sugars creates the perfect texture.
- Large eggs (2): They bind everything together and help the cookies spread just slightly for that chewy edge.
- Vanilla extract (2 tsp): Use real vanilla, not imitation—your palate will notice the difference.
- All-purpose flour (2 1/2 cups): This is your structure; don't sift unless your flour is seriously clumpy.
- Unsweetened cocoa powder (1/2 cup): The subtle richness that whispers of chocolate without overpowering the espresso.
- Instant espresso powder (2 tbsp): This is non-negotiable for that coffee shop authenticity you're chasing.
- Baking soda (1 tsp): It helps the cookies spread and keeps them tender.
- Salt (1/2 tsp, for cookies): A pinch amplifies every flavor without tasting salty.
- Heavy cream (2 cups): Use the full-fat version; it's what makes ice cream taste like ice cream.
- Whole milk (1 cup): This keeps the mixture silky without being too heavy.
- Granulated sugar (3/4 cup, for ice cream): Fresh sugar for the custard base ensures smooth texture.
- Vanilla bean (1 whole, split and scraped): Those tiny black specks are pure flavor—if you can't find real vanilla beans, vanilla bean paste works beautifully.
- Salt (pinch, for ice cream): Enhances sweetness and rounds out the vanilla flavor.
Tired of Takeout? 🥡
Get 10 meals you can make faster than delivery arrives. Seriously.
One email. No spam. Unsubscribe anytime.
Instructions
- Heat the vanilla custard base:
- Pour milk, sugar, vanilla bean seeds and pod into a saucepan and let it warm over medium heat until the sugar completely dissolves and steam rises gently—you'll smell the vanilla before you see it bubble. Once it's warm but not boiling, pull it off the heat and stir in the heavy cream and salt.
- Chill the ice cream mixture:
- Cover your custard and let it sit in the refrigerator for at least 2 hours until it's properly cold—this step isn't optional if you want smooth, creamy results. I usually make this the night before and let it chill overnight.
- Churn into ice cream:
- Transfer to your ice cream maker and churn according to its instructions, which usually takes 20 to 30 minutes. The mixture should look like soft-serve when you're done—don't stop too early hoping for firmer texture.
- Freeze the ice cream slab:
- Spread the churned ice cream onto a parchment-lined 9x13-inch pan to about 1 inch thick and slide it into the freezer for at least 2 hours until it's solid enough to cut cleanly with your round cutter.
- Cream the cookie butter:
- In a large bowl, beat together softened butter with both brown and granulated sugars until the mixture looks light and fluffy—this takes about 3 minutes and sets the texture foundation for your cookies. Scrape the bowl frequently so everything combines evenly.
- Incorporate eggs and vanilla:
- Add eggs one at a time, beating well between each addition, then pour in the vanilla extract and mix until smooth. The batter should look creamy and slightly pale at this point.
- Mix in dry ingredients:
- In another bowl, whisk together flour, cocoa powder, espresso powder, baking soda, and salt so everything distributes evenly. Add this to your wet mixture gradually, stirring just until combined—overmixing will make the cookies tough.
- Roll and cut the cookie dough:
- Divide dough in half and roll each piece between two sheets of parchment to about 1/4 inch thick, which is thinner than you might expect but perfect for crispy-edged cookies. Use your 3-inch round cutter to stamp out 16 cookies.
- Bake until set:
- Place your cut cookies on parchment-lined baking sheets and bake at 350°F for 10 to 12 minutes—they should look set around the edges but still slightly underbaked in the center. Let them cool completely on a wire rack before assembling.
- Cut ice cream to match:
- Once the ice cream slab is frozen solid, use that same 3-inch round cutter to stamp out 8 rounds—this is the moment you realize how satisfying a perfect fit feels.
- Assemble the sandwiches:
- Place each ice cream round between two cooled cookies and press gently—they should stay together naturally without any frosting needed. Wrap each sandwich in parchment and return to the freezer for at least 1 hour before serving.
 Save
Save There's something magical about pulling these from the freezer on a hot day and watching someone bite through that crispy espresso cookie shell into cold, creamy vanilla center. It's the small gesture that somehow feels fancy without requiring much skill, just a little patience and planning.
No Ice Cream Maker No Problem
If you don't have an ice cream maker, your custard can still become creamy—freeze the chilled mixture in a shallow pan and stir it vigorously every 30 minutes for about 3 to 4 hours until it reaches soft-serve consistency. It takes more effort and elbow grease, but the flavor remains unchanged and honestly, the texture often turns out just as good.
Flavor Variations and Customizations
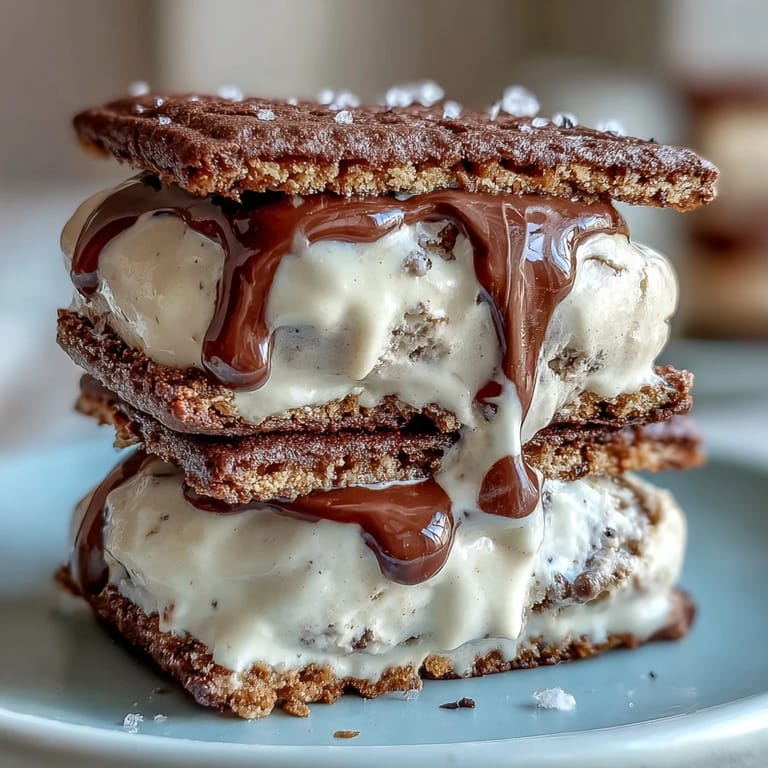
Once you master the basic version, these sandwiches beg for experimentation—I've pressed the edges in mini chocolate chips, crushed espresso beans, or even chopped hazelnuts before the final freeze. You could also swap the vanilla ice cream for coffee, salted caramel, or even Irish cream flavored versions if you want to keep the espresso cookie base but shift the profile entirely.
Storage and Make Ahead Tips
These sandwiches actually improve slightly as they freeze because all the flavors meld together—make them up to one week ahead and they'll be waiting patiently in your freezer. Let them sit at room temperature for just 2 to 3 minutes before eating if you prefer them slightly softer, otherwise pull straight from the freezer for maximum texture contrast.
- Wrap each sandwich individually in parchment so they don't stick to each other or absorb freezer odors.
- Store them in an airtight container on a flat shelf where they won't get crushed by heavier items.
- If the cookies soften after a few days, pop the whole sandwich back in the freezer for 30 minutes to re-crisp the edges.
 Save
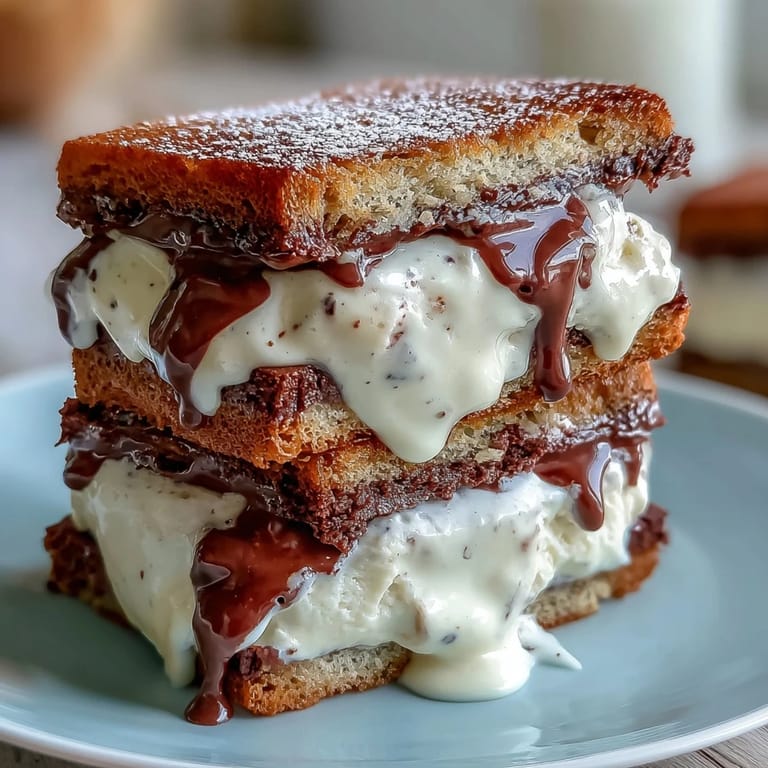
Save These sandwiches sit at that sweet spot between homemade and impressive—simple enough for a weeknight project but fancy enough for company. Once you nail the recipe, you'll find yourself making them constantly, and your freezer will be all the better for it.
Recipe FAQs
- → How can I make the ice cream without an ice cream maker?
Freeze the ice cream base in a shallow dish and stir every 30 minutes until thick and creamy, mimicking churning.
- → What gives the cookies their espresso flavor?
Instant espresso powder mixed with cocoa powder adds a rich coffee note balanced by chocolate in the cookies.
- → Can I customize the sandwich edges for texture?
Yes, roll sandwich edges in mini chocolate chips or crushed espresso beans before freezing for added crunch.
- → How long should the assembled sandwiches freeze before serving?
Freeze assembled sandwiches for at least 1 hour to ensure they are firm and easy to handle.
- → Is it possible to use store-bought ice cream?
Substitute store-bought vanilla bean ice cream to simplify preparation and save time.